WhatsApp Business Automation Chennai: A Step-by-Step Guide
WhatsApp Business, Automation, Chennai, Step-by-Step Guide
WhatsApp Business Automation Chennai: A Step-by-Step Guide
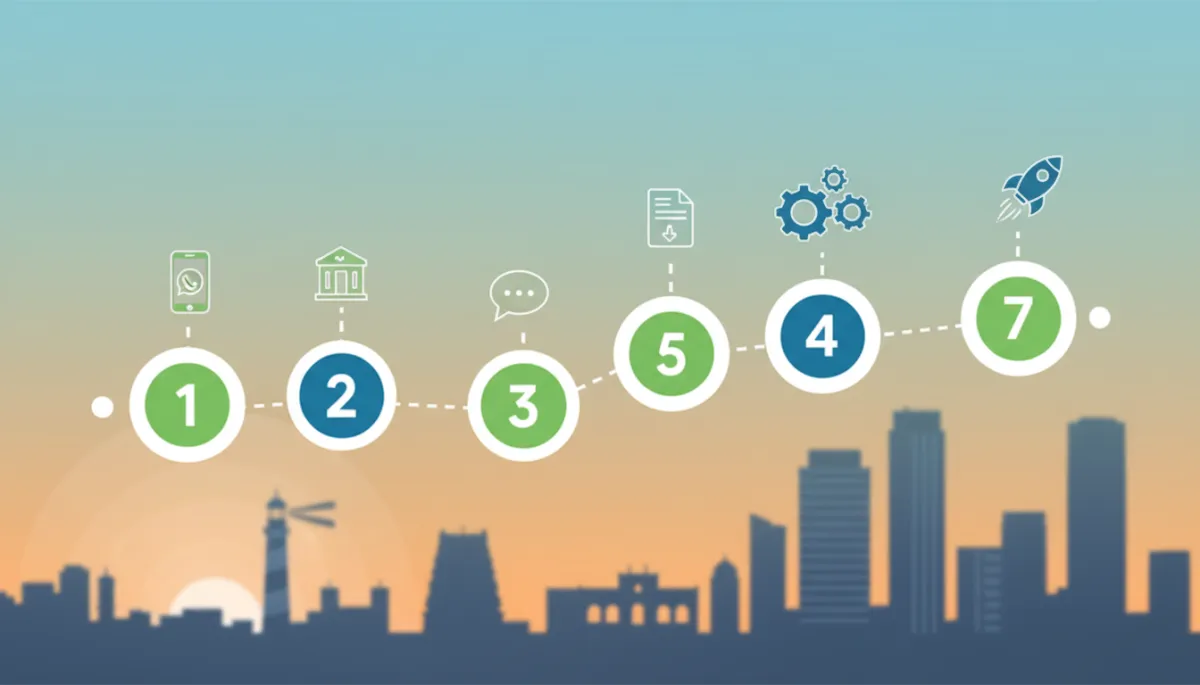
WhatsApp Business Automation Chennai: A Step-by-Step Guide is written for busy Chennai business owners who want a clear, practical path from zero to a fully live WhatsApp automation system. In this tutorial, you’ll follow a numbered, no-jargon walkthrough that covers everything: account setup, Facebook Business Manager, WhatsApp Business API access, message templates, automation flow building, testing, and going live. By the end, you’ll know exactly what to click, what to submit, and what to avoid so your automation launches smoothly the first time.

Before You Begin — What You Need Ready
Before we set up WhatsApp Business automation Chennai style, you need a few basics ready. When we onboard clients in Nungambakkam, Egmore, Porur, and Tambaram, we always start with this checklist. Having these items in place cuts approval time and reduces the chance of frustrating rejections or delays.
- A dedicated mobile number not actively used on personal WhatsApp. If it is, you must delete that account before API registration.
- Official business documents for India and Tamil Nadu: GST certificate (with correct legal name and address), Shop & Establishment certificate or Udyam registration, and PAN of the business or proprietor. Meta’s verification team checks that these match your Facebook Business Manager details exactly.
- Business address in Tamil Nadu that appears on your documents. Many Chennai businesses get stuck because they try to use a different marketing address from the GST address. Keep them consistent during verification.
- A business email ID using your domain (for example, [email protected]), not Gmail or Yahoo if you can avoid it. This increases trust during Meta review.
- A simple website, landing page, or at least a Google Business Profile that clearly shows your brand name, address, and services. This helps Meta confirm that you are a real business, even if you are a small local shop in T. Nagar or Velachery.
Step 1 — Create or Convert Your WhatsApp Business Account
Your WhatsApp Business account is the foundation. Even if you plan to use the WhatsApp Business API later, you should first set up the app correctly. Here’s exactly how we do it for our Chennai clients.
Download WhatsApp Business App
- On your phone, open the Google Play Store or Apple App Store and search for “WhatsApp Business” (green icon with a white “B”).
- Install the app and open it. When prompted for a number, use your dedicated business number, not your personal WhatsApp number. If that number is already connected to WhatsApp, back up chats and delete that account first.
- Verify the number using the OTP received via SMS or call. Keep this SIM accessible; you may need it again during API setup.
Complete Your Business Profile (Every Field Matters)
Meta uses your profile details later when you apply for WhatsApp Business API. Incomplete or inconsistent profiles are a common stumbling point for Tamil Nadu businesses. Fill out every field carefully:
- Business name: Use your legal business name as on GST and PAN. If your shop board says “Sri Lakshmi Silks” but GST says “Sri Lakshmi Silks Pvt Ltd”, use the GST version here. This helps with display name approval later.
- Business category: Choose the closest match (for example, Clothing Store, Coaching Centre, Restaurant, Real Estate Agent). This also influences what kind of automation flows make sense later.
- Description: Write 2–3 lines clearly explaining what you do and who you serve in Chennai. Example: “We provide same-day AC repair and maintenance services across Velachery, Adyar, and OMR.”
- Address: Enter the exact address that appears on your GST certificate, including city (Chennai), state (Tamil Nadu), and pincode. This is critical for business verification later.
- Add your business hours, email, and website or Google Maps link. These details increase customer trust and help when you apply for the green tick (which Nielsen found can increase customer trust by 40% and open rates by 33% in 2023).
Step 2 — Set Up Facebook Business Manager
To access WhatsApp Business API, you must connect your business to Meta (Facebook). This happens inside Facebook Business Manager (also called Meta Business Manager). Here’s how we guide our Chennai clients through it, step by step.
Create Your Business Manager Account
- Go to business.facebook.com and log in with your Facebook profile (preferably the one you use for your business page).
- Click Create Account, then enter your business name, your name, and your work email. Again, use the same legal name as in your GST certificate and WhatsApp profile.
- In Business Settings → Business Info, fill in your address, phone number, website, and tax ID (if asked). Double-check spelling — most rejections we see in Chennai are due to tiny mismatches in spelling or address format.
Verify Your Business
Next, you need to complete Meta Business Verification (MBV). As of 2026, this is mandatory for WhatsApp Business API access and usually takes 1–5 business days when your documents are in order (Meta Business Platform, 2024; go4whatsup.com, 2026).
- In Business Manager, go to Security Center and click Start Verification.
- Select your business type (for most Chennai SMEs, this will be “Registered Business”) and upload: GST certificate, Shop & Establishment or Udyam registration, and any other document Meta requests. Make sure scans are clear and not cropped.
- Meta might send a verification code to your business email, phone, or website domain. Complete that step quickly to avoid delays.
Step 3 — Apply for WhatsApp Business API Access
Once your Business Manager is verified, you’re ready for the WhatsApp Business API setup steps. The API (now called WhatsApp Business Platform) is what allows real automation, integrations, and advanced flows. Most Chennai businesses should use a Business Solution Provider (BSP) rather than trying to build everything from scratch.
Choose a BSP (Business Solution Provider)
A BSP provides the platform, interface, and support so you don’t need to code directly on Meta’s Cloud API. For our Chennai clients, we use https://studio.revmaxapp.com/whatsapp-automation-chennai, which is built specifically to simplify WhatsApp automation flows Chennai businesses need: instant lead replies, follow-ups, FAQs, and CRM sync.
- Ensure the BSP is officially approved by Meta and supports Cloud API (on-premises API was discontinued in 2025).
- Confirm they provide no-code flow builders, template management, and integrations with your CRM or Google Sheets.
Submit Your API Application
- Inside your chosen BSP (for example, RevMax Studio), start the WhatsApp Business API onboarding or “Connect WhatsApp” flow. Typically you’ll log in with your Facebook account and select your verified Business Manager.
- Connect your WhatsApp Business Account (WABA) and choose the phone number you prepared. Remember: this number cannot be active on any existing WhatsApp account at this time.
- Enter your display name. This must match your brand and legal documentation. Meta usually reviews display names within a day once all other requirements are met (go4whatsup.com, 2026).
What Happens During the Review Period
After submission, Meta reviews your business, documents, and display name. With everything in order, WhatsApp Business API approval usually takes 1–5 business days (Meta Business Platform, 2024). During this period:
- You may receive emails from Meta or your BSP asking for clarifications. Respond quickly to avoid resets in the queue.
- Your messaging limits will start small and grow as you send compliant messages and maintain high quality scores.
Step 4 — Create and Submit Your First Message Templates
Any message you send outside the 24-hour customer-initiated window must use a pre-approved template. As of 2026, templates are categorised as Utility, Authentication, or Marketing, and promotional templates usually require up to a 24-hour review window (Meta, 2024). Getting this right early saves a lot of back-and-forth.
Types of Templates You Need
For a basic 3-flow WhatsApp automation system (instant lead reply, 3-day follow-up, FAQ bot), we recommend at least these templates:
- Lead confirmation (Utility): Confirms that you received an enquiry and sets expectations on response time. Example: “Hi {{1}}, thanks for contacting {{2}}. We’ve received your enquiry and will respond within 15 minutes.”
- Appointment or callback reminder (Utility): Used in your 3-day follow-up sequence to nudge cold leads politely.
- Offer or promo (Marketing): For limited-time discounts, new product launches, or seasonal campaigns in Chennai (for example, Pongal or Deepavali offers).
Writing Templates That Get Approved First Time
When we create templates for Chennai clients, we follow a simple rule: be clear, respectful, and non-spammy. Here’s how to improve your approval rate:
- Use neutral, professional language. Avoid all caps, too many emojis, or pushy phrases like “BUY NOW!!!”.
- Keep variables simple:
{{1}}for customer name,{{2}}for business name,{{3}}for date or time, and so on. - Choose the correct category (Utility vs Marketing). Many rejections happen when promotional text is submitted as Utility or Authentication (drol.dev, 2026).
- Always include a clear opt-out line in marketing templates, such as “Reply STOP to unsubscribe.” This keeps your quality score healthy.

A simple dashboard helps Chennai teams manage templates, flows, and quality in one place.
Step 5 — Build Your Core Automation Flows
Now comes the part that actually saves you time and wins more business: automation flows. According to the HBR Lead Response Management Study, the instant lead reply alone can drive a 21x improvement in lead qualification rate. From our experience with Chennai clients, combining three simple flows gives you a powerful system that can be built in 4–8 hours with the right platform (RevMax implementation data, 2024).
Tools like RevMax WhatsApp Automation Studio let you drag-and-drop these flows without coding. You can also refer to our WhatsApp CRM complete setup guide if you want tight integration with your sales pipeline.
The Instant Lead Reply Flow (Set Up in 15 Minutes)
- In your BSP’s flow builder, choose a trigger such as “New incoming WhatsApp message” or “Lead submitted from Facebook/website form”.
- Add a send message step that uses your approved lead confirmation template. Personalise with the customer’s name and context (for example, the service they enquired about).
- Optionally, ask one or two qualifying questions using quick reply buttons — budget range, location (for example, “Velachery / OMR / Other”), or preferred time for a callback.
The 3-Day Follow-Up Sequence
Many Chennai businesses lose leads simply because they don’t follow up consistently. A simple 3-day sequence can dramatically increase conversions without feeling spammy.
- Day 0 (same day): Instant lead reply template (already set up above).
- Day 1: If the lead hasn’t replied, send a gentle reminder: “Hi {{1}}, just checking if you had any questions about {{2}}. Would you like to book a quick call?” Use a Utility or Marketing template depending on content.
- Day 3: Final follow-up with a clear choice: “Reply 1 to talk to our team today, 2 if you want more details on WhatsApp, or STOP to unsubscribe.”
Configure this in your BSP as a time-delay flow: after the first message, add a 24-hour wait, check if the lead responded, then send the next template only if there was no reply. This keeps your account safe and respects customer preferences.
The FAQ Auto-Reply Bot
Automation shines when it handles repetitive questions: timings, pricing ranges, location, appointment booking, and basic service details. Studies show up to 67% of standard customer queries can be resolved by automation alone (searchlab.nl, 2026).
- List your top 10 FAQs from Chennai customers. For example: “Do you serve Tambaram?”, “What are your fees?”, “How long does delivery take inside Chennai city limits?”
- In your BSP, create a keyword-based or menu-based bot. For example, send a menu: “Reply 1 for services, 2 for pricing, 3 for timings, 4 for locations we cover.”
- Configure answers that are short, clear, and include links to your website or Google Maps when useful. For more advanced AI-based flows, see what to know about AI WhatsApp automation.
Step 6 — Test Everything Before Going Live
Skipping testing is one of the biggest common mistakes to avoid during setup. According to Zendesk (2023), 74% of businesses that tested their automation before launch reported smoother first-week performance. Here’s the testing checklist we use with Chennai clients:
- Test from multiple personal numbers (Jio, Airtel, VI) across different locations in Chennai to ensure OTPs, templates, and flows work reliably.
- Trigger each flow manually: send a new lead message, wait for the instant reply, and confirm the 3-day sequence triggers correctly if you stay silent.
- Test FAQ keywords with spelling variations and common “Chennai English” phrases your customers actually use.
- Check that “STOP” or “UNSUBSCRIBE” is honoured immediately by your flows and that no further marketing messages go to those numbers.
Step 7 — Go Live and Monitor Your First Week
Once testing looks solid, you’re ready to go live. This is where WhatsApp Business automation Chennai businesses set up correctly starts paying off — faster responses, more qualified leads, and fewer missed opportunities. But the first week is critical for monitoring and adjustments.
- Announce your WhatsApp number on your website, Google Business Profile, social media, and in-store signage. Use QR codes at your physical location to make it easy to start a chat.
- Inside your BSP, monitor message delivery, read rates, and response rates. WhatsApp Business messages typically see open rates near 98% (searchlab.nl, 2026), so if your numbers are much lower, revisit your templates and targeting.
- Watch your quality rating (Green/Yellow/Red). High block or report rates can reduce your messaging tiers. Adjust frequency and content if you see negative signals.
- Collect feedback from your team and customers in Chennai: Are the FAQs accurate? Are follow-ups too frequent? Do they prefer English, Tamil, or a mix? Adjust flows accordingly.
Over time, you can expand with more advanced flows — abandoned cart reminders, payment confirmations, and loyalty programs. For inspiration on scaling, check out what actually works in 2026 and our WhatsApp marketing automation guide for small businesses.
Frequently Asked Questions
1. How long does the complete WhatsApp Business automation setup take from start to finish?
For most Chennai SMEs, we see a full journey of 7–14 days, depending mainly on how fast you provide documents and approve flows. Meta’s business and API approvals typically take 1–5 business days when everything is in order, and building a basic 3-flow automation system usually takes 4–8 hours with a user-friendly platform (RevMax implementation data, 2024). If you’re organised and follow this step-by-step guide, you can go from zero to live in about one week.
2. What documents do I need to verify my business on WhatsApp Business API in India?
For Tamil Nadu and India, you typically need:
- GST registration certificate (with legal name and address).
- Shop & Establishment certificate or Udyam/Udyog Aadhaar registration, if applicable.
- PAN of the business entity or proprietor.
- A website or online presence that clearly shows your brand and address.
The key is consistency: the business name and address on your documents must match what you enter in Meta Business Manager and WhatsApp Business.
3. Can I run WhatsApp automation without a website or registered company?
You can use the WhatsApp Business app with basic quick replies and labels even if you are not a registered company. However, for full WhatsApp Business API access and advanced automation flows, Meta expects a legally registered business and some form of online presence. If you’re an early-stage Chennai entrepreneur, start by:
- Registering under Udyam (for MSMEs) and getting a GST number if required, and
- Setting up at least a simple landing page or Google Business Profile that shows your brand clearly.
4. What is the cheapest way to set up WhatsApp Business automation for a small Chennai business?
If budget is tight, start with:
- The free WhatsApp Business app for basic quick replies and away messages.
- A low-cost BSP plan that includes template management and a simple flow builder, instead of building your own tech stack.
From our experience, trying to “save” by avoiding a proper platform often leads to more cost later in lost leads and account issues. Tools like RevMax Studio are designed to be affordable for Chennai SMEs while still following the right way to set up WhatsApp Business automation.
5. What should I do if my WhatsApp message template gets rejected?
Template rejections are common, especially for marketing content. If this happens:
- Read the rejection reason in your BSP or Meta dashboard. It usually mentions if the issue is category, content, or formatting.
- Simplify the message: remove aggressive sales language, reduce variables, and clearly mention your brand name and purpose of the message.
- Ensure you’re using the correct category (Utility vs Marketing) and include a clear opt-out line for promotions.
If you’re still stuck, compare your template with examples in our what actually works in 2026 guide, or reach out to a specialist who has handled approvals for multiple Chennai businesses.
Start Your Step-by-Step Setup Today (CTA)
You’ve just walked through a complete, practical roadmap for WhatsApp Business automation Chennai businesses can follow from scratch — from account setup and API access to flow building and going live. If you implement all seven steps carefully, you’ll dramatically reduce your risk of quality issues, missed leads, and failed campaigns, and build a system that works for you 24/7.
If you’d rather skip the trial and error, we can help you set this up end-to-end — just like we’ve done for businesses in Nungambakkam, Egmore, Porur, and Tambaram. Get your WhatsApp Business API, templates, and automation flows configured correctly the first time with https://studio.revmaxapp.com/whatsapp-automation-chennai. Start your step-by-step setup today and turn WhatsApp into your most reliable lead and customer service channel.
